
Hello friends. I’ve been a bit absent on this blog of late. Apologies. I’ve got a few things to share but will admit that life has gotten in the way of the making of late. That said, this project has sucked up a lot of my evening and weekend time in the last month! Four muslins and a fit bootcamp with Andrea, Kristin and Sarah for starts! So.many.changes! I may do a post describing the fit changes that I made but first… my friend Anne modelling!


If you’re at all familiar with the Colette Albion pattern (and of course you are!), then it’s probably fairly obvious that I made some changes. I had originally planned to make this jacket in its original form for my Brother (still plan to do so!) but didn’t think I had any need for such a coat in my own wardrobe. However, on a search for RTW duffle coats, these two gorgeous coats from Burberry popped up and I was sold!


I really loved the casual style of the grey one with the extra pockets, relaxed A-line shape and cropped length. I also liked the idea of making the neckline taller or adding a collar as this would make the coat far more functional in a winter and wind friendly city like Toronto! However, I also loved the deep pleat in the back of the red duffle coat. I think it makes a boxy coat just a touch more feminine. Anyway, after coming across these, I decided that I did indeed need a duffle coat in my life! The sewalong that Colette Patterns was hosting was just the icing on the cake!
Sadly, disaster struck in the form of muslin #1! First of all, one should always pay attention to the actual pattern instructions when they are making a muslin and not assume they know how everything goes together based on previous experience! I made the size small (this is a unisex pattern that was really drafted with men in mind) based on my upper bust measurement. Then I made the mistake of adding the facing to centre front. Oops! Turns out that the facings were for the lining only! Needless to say, this muslin was HUGE! The facings ended up being a serendipitous mistake based on my plan to extend them at the top and add a collar. That’s the absolute truth and I am sticking to it!
 OK. I’ll attempt to quickly sum up the muslin stage, which hurts as the muslin stage was a solid 3 weeks of work while the actual sewing was only a week. A crazy, crazy week filled with late nights and little sleep but who cares! It’s done! Anyway, my second muslin was a straight size XS but I didn’t love this one. It still had a lot of the same fit issues as the small (extra fabric at the front due to my addition of the facings, droop-y shoulders, low armscythe, etc). However, I found the XS a wee tight in the arms and across the back. So I took the size small muslin to the fit bootcamp and stood like a lump while Sarah and Andrea slashed away amid mad chatter involving numbers and technical jargon. They did a rounded back adjustment (a big one! Yoga, you and I need to be better friends), a forward shoulder adjustment and pinned a bunch of fabric out of the front (starting at the shoulder seam and working down to the hem in a line parallel to the grainline). Now that I had taken that extra fabric out of the front, I widened the darts that were now in the back yoke after the rounded back adjustment (Andrea, please feel free to correct my jargon as I’m not sure that is the correct term) to eat up some of the extra fabric and used the feed dogs to do some easing to eat of the rest of it. Incredibly, everything worked out!
 I was tempted to do a narrow shoulder adjustment but decided that I liked a slightly relaxed look to the shoulder and the addition of shoulder pads kept everything from dragging and sagging. I did try correcting the sleevehead to match the forward shoulder adjustment as Heather demonstrates here but my muslin and all of the horizontal balance lines told me that was a no go. The original sleeve worked much better. I also raised the base of the armscythe a half inch using a tutorial found in the June/July issue of Threads (thanks for pointing me in the direction of this, S!). This was a challenge without a large work surface! Using the same tutorial, I also took in the side seam a half inch at the armscythe and removed a quarter inch out of both sleeve seams to match. I still find it all a bit low and restrictive but it’s not too bad now that the lining is in. Gives me lots of space for layering with those big sweaters I so love to knit.
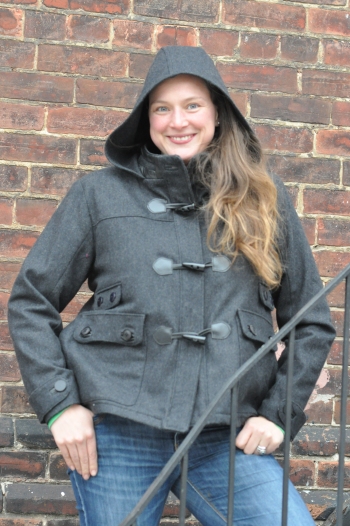
I kept the patch pockets but made them a bit smaller to accomodate the cropped length and rounded all of the edges. Similarly, I rounded the edges of the sleeve tabs to be consistent and just to soften the coat and make it a but more feminine. I kept the side seam pockets (drafted my own to keep things small and tidy) and added a double welt pocket with a flap above the patch pockets, successfully ripping off my Burberry inspiration coat! I used the flannel lining fabric for the pocket bags of the inseam pockets to avoid a lot of bulk. I lined the patch pockets with a bright pink rayon bemberg (also used to line the sleeves) using some tips from this book. I used the same pink bemberg for the pocket bag of the welt, again in an effort to avoid unnecessary bulk.
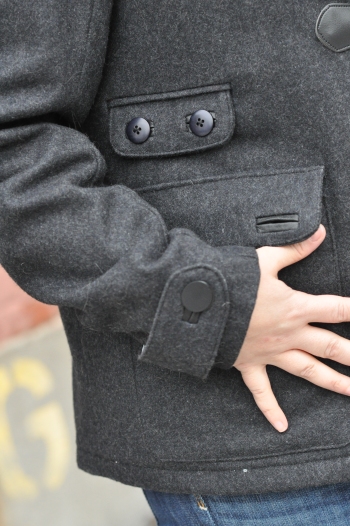 I wanted to add some leather accents using leather scraps that I had picked up awhile ago. They’re small, which limited what I could use them for so I went for leather bound buttonholes (using this method). These were a time sucker but I love them! Well worth the effort!
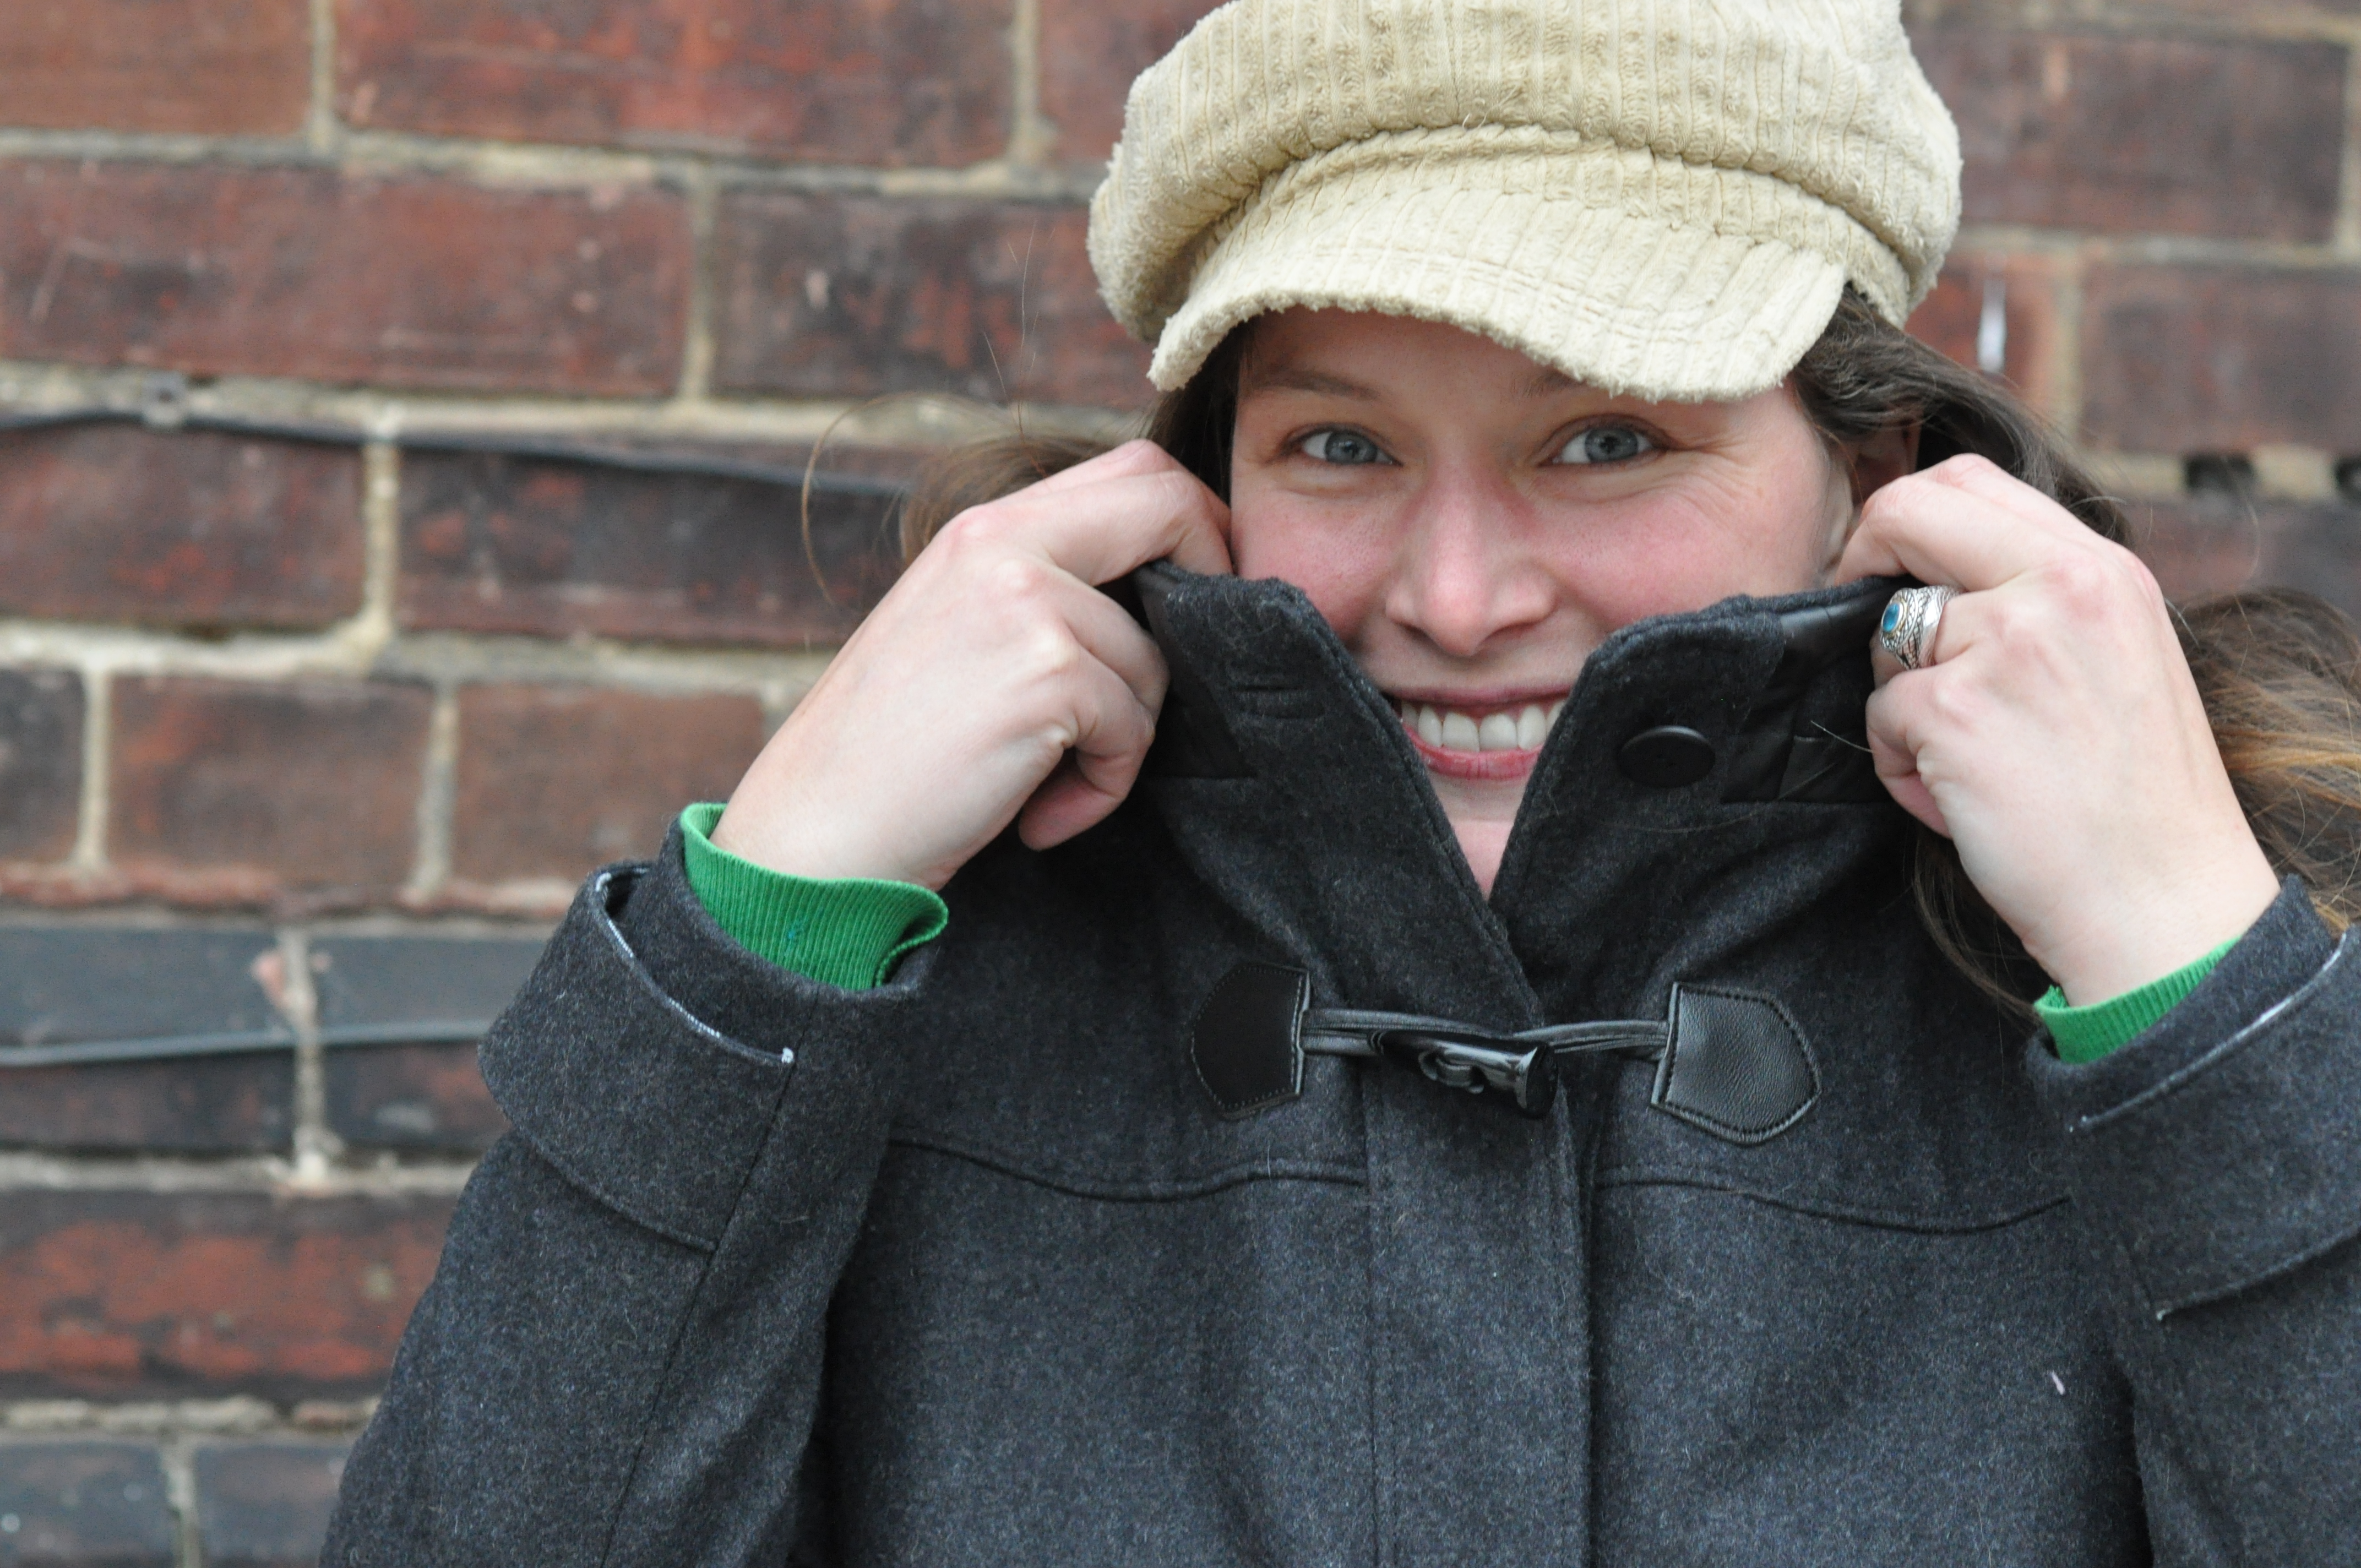
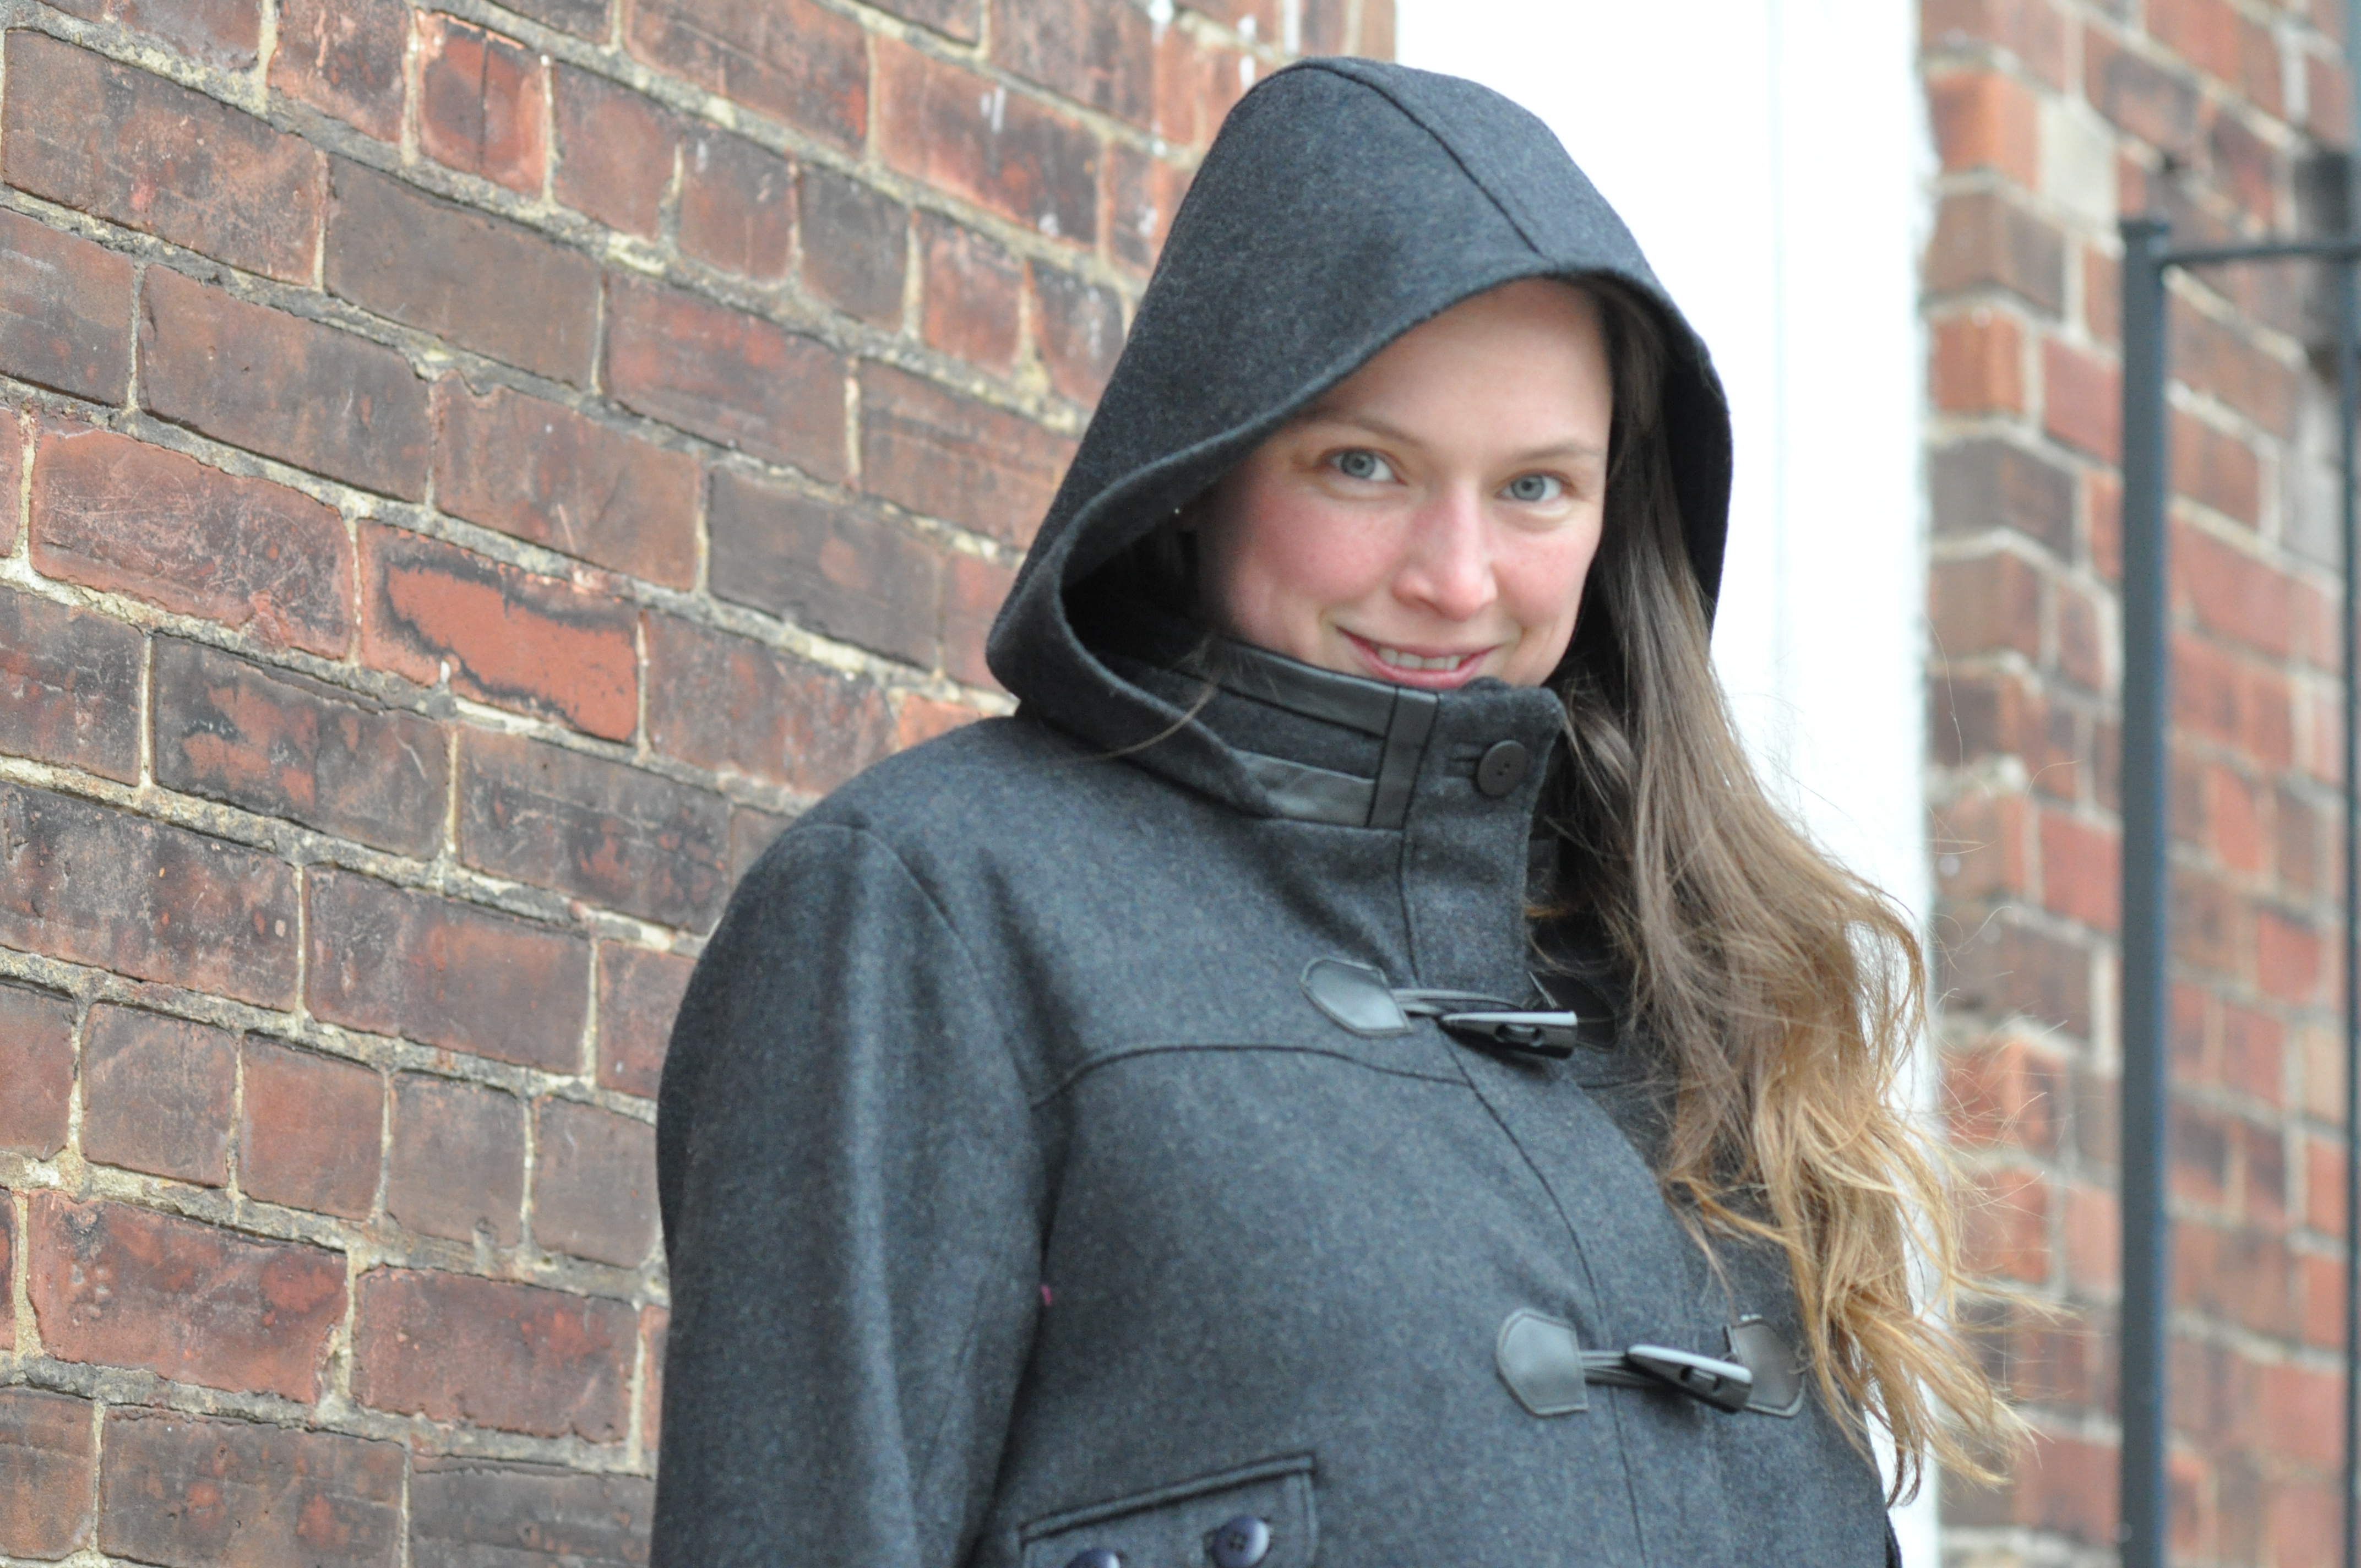
 And then there is the collar. Sigh. I really wanted the collar to be the highlight of this coat and while I think it looks great, there are still things I wish I could change. To start, I spent a lot of time trying on RTW coats to decide what kind of collar/hood combo I wanted. In the end, I decided that I prefer having a stand collar that is separate from the hood… I really, REALLY hate the feeling of having the collar being tugged backwards when the hood is attached and down! So I kept the hood as is and I will say that this is an excellent hood! The perfect size and shape! I left it unlined and flat felled the seams as I didn’t want it to be a major feature and detract from the leather accents. I drafted the collar piece and on the muslin I was quite pleased with how it turned out. On the jacket? Well, I have a few issues with it. It’s stiff! And I think it looks a bit like it should have a giant helmet attached to it! I honestly think it could support the weight of a helmet!

Not at all irritated by the collar!
And on me, it looks like I have no neck but on my tall friend Anne, the collar looks great and she loved it so maybe I’m being hypercritical. I do love the leather accents on it! I want to have mitered corners with the leather but by the time I got to making this, I was tired of the whole project and didn’t want to take the time! So I’m going to call the collar a success. Besides, the wool and leather will soften over time so I’ll feel less like I’m being choked by it!

I used this buffalo plaid flannel for the lining of the body but used hot pink bemberg for the sleeves (easier to get it on and off). I’ll have to take a picture of the entire lining as the pink really is an awesome pop of colour! I had planned to use the pink to make piping between the inner facing and the lining for another pop of colour. I have the piping but forgot to add it and again, was tired of the project at this point and didn’t want to redo anything unnecessary. Perhaps if I had not already graded the seams! I also added an inner welt pocket that holds my cell phone perfectly!


I think that about covers it! Well, I did also add the deep pleat in the back but there’s not much to say about it. I’m not sold on the back tab that I made and I think I might make a bigger one with leather bound buttonholes. Certainly the entire coat needs better buttons as they are a definite feature. I plan to go digging through the vintage button collection that Karyn has at the Workroom to find something outstanding to finish this all off!
Finally, here are some pictures of me in the duffle coat. The fitting was done on me but I really think this works better on Anne, which is funny as we are not built the same way. She has broader shoulders, is much taller and does not have the generous booty of a pear-shaped woman! Thoughts on the fit on each of us?
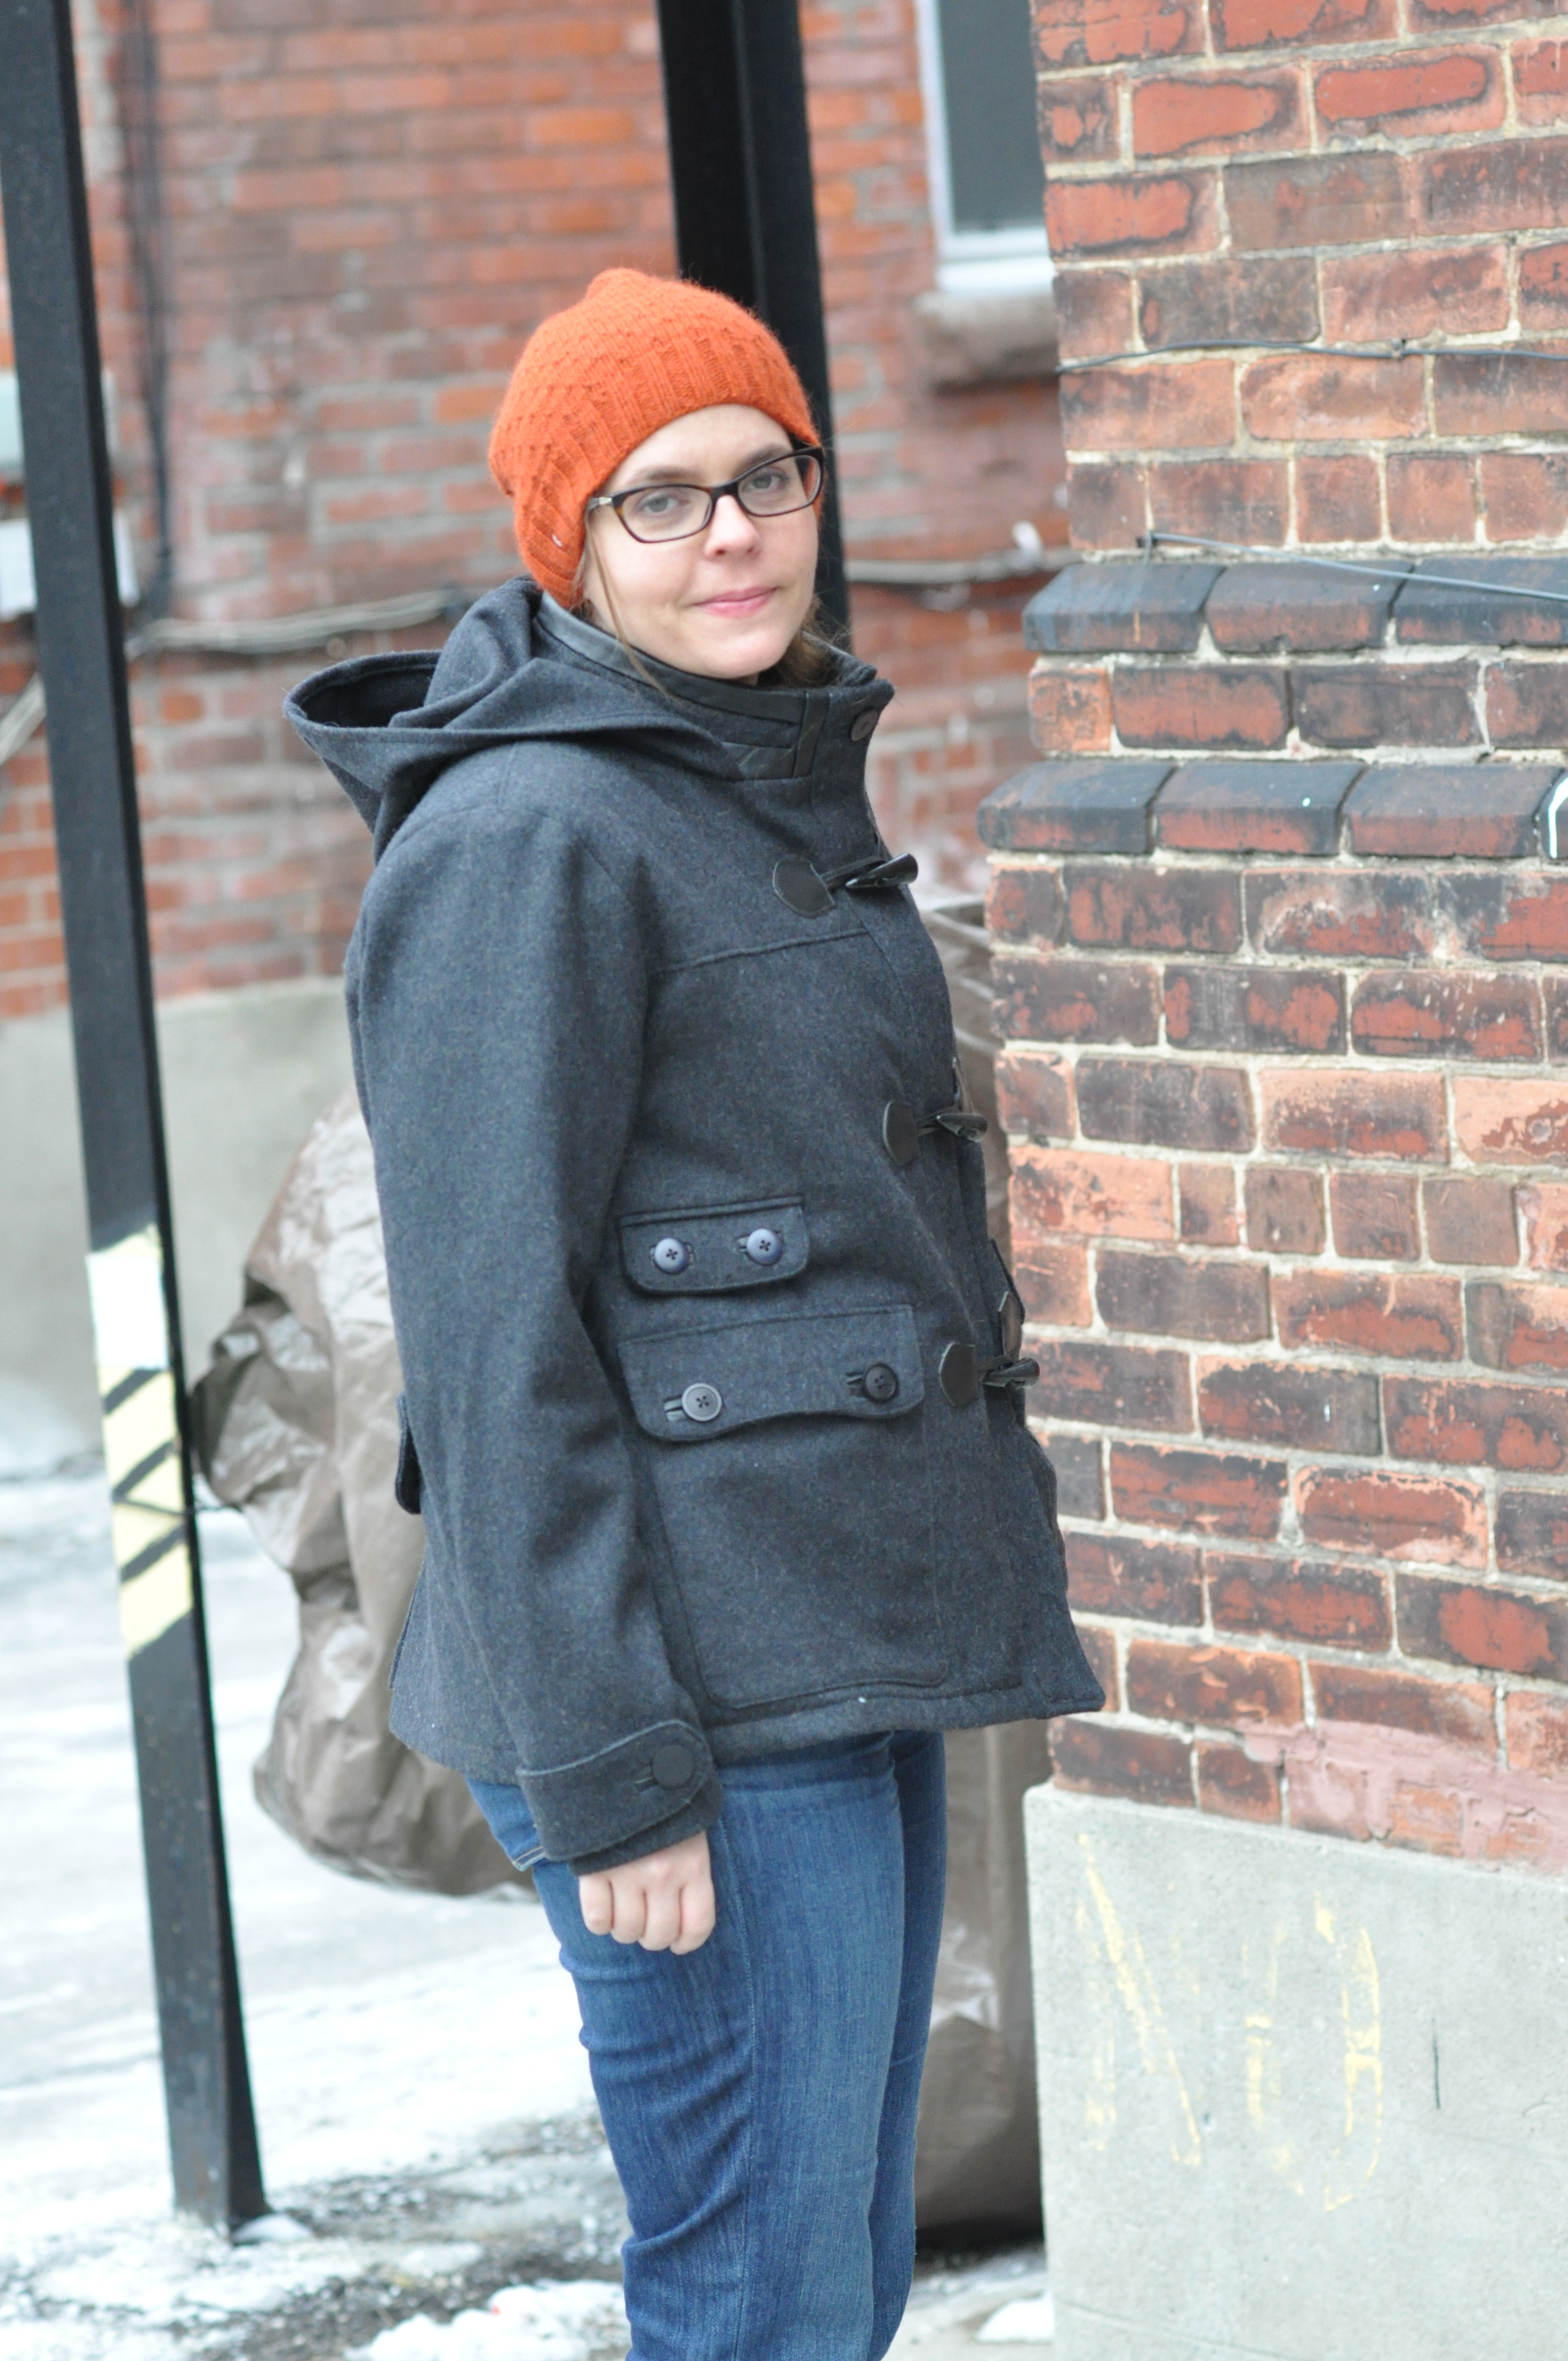
All in all, I am pleased with the fit of this across the chest, shoulders and back. It looks a but big across the back on me here but I’ve only got a T-shirt on underneath. This is not a lightweight coat and is more likely to be worn over my usual winter layers and the fit accommodates all of that. Again, I think the collar is the wrong height and shape for me and the overall length… not so flattering. It needs to be a bit shorter so that it doesn’t hit me at my widest point.

In short, when I wear this I feel a little dumpy and irritated by things I wish I could change. When I see Anne in it, I think “shit, I made that! I’m AWESOME”.
Make sure you check out the rest of the sewalong entries here! There are some seriously gorgeous coats in this pool!
Sara
Linking up with: Make It and Love It
